Model Railway Musings
  • Home
  • My Linear Motor Layouts
    • Overview
    • How it Works
    • Layout - Monbulk Creek
    • Layout - Outer Melbourne
    • Layout - Dauntsey Lock
    • Layout - Penzance 1913
    • Layout - Slot Cars
    • Layout - Malmsbury
    • Layout - Aller Junction
  • My Conventional Layouts
    • Layout - Blea Moor
    • Layout - Sarum Bridge
    • Layout - Plymouth Citadel
    • Layout - Dunharrow
    • Layout - Arkham Bank
  • Other Layouts
    • Layout - Mousehaven
    • Layout - Eyarth
  • T Gauge
    • T Gauge Experiments
    • T Gauge PWM Controller
  • Electronic Tips
    • Blue Pill - Bare Metal C Programming
    • Working Roads
    • Hybrid DC - DCC Controller
    • Using LEDs
    • Connectors
    • Controlling the Fleischmann Turntable
    • Constant Brightness Tail Lamps (OO scale)
    • Point Motors and Relays
    • Point Motors and Toggle Switches
    • Dapol Signals
    • Colour Light Signals and Automation
    • Synchronized Fast Clocks
    • Wire Sizes and Voltage Drop
    • DC Controllers
    • Controller Types
    • Feedback Controllers
    • Working Level Crossing
  • General Tips
    • Control Panels and Signal Box Diagrams
    • B&B Couplings
    • Laying Peco Code 55 Track
    • Peco N Platform Edges
    • Gradients
    • Train Cam
    • Scale Speeds
  • 3D Printing
  • Contact
  • Links

Dauntsey Lock

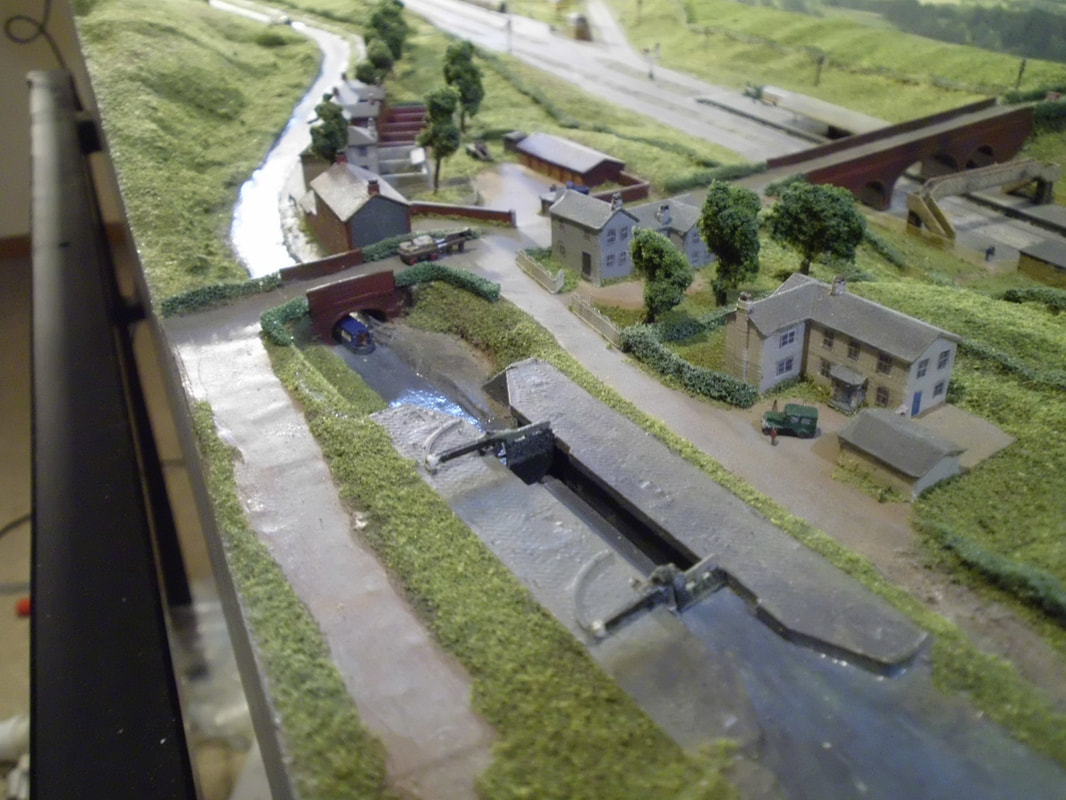
My third linear motor layout returns to a UK prototype, a 6' x 2' model of Dauntsey, a long-vanished small station on the GWR main line to Bristol in the 1930s, modelled in 1:480 scale. It features a double track main line, automated shunting into the goods yard and refuge siding, and working road and canal scenes.
The 3rd Linear Motor Layout
Points and Automated Shunting
Tracklaying and New Electronics
A Working Canal Lock
Tracklaying Complete
Wiring Complete
Buildings
First Signs of Life
Scenery Foundation
GWR Passenger Stock
GWR Passenger Stock 2

Basic Scenery
Backscene
More Scenery
The Canal
The Lock Mechanism
Locos and Passenger Stock
Goods Wagons
Goods Wagons (video)
Nearly Finished
Finished (for now)

Picture
Picture
Powered by Create your own unique website with customizable templates.