Plymouth Citadel - Scenery
The scenery for a track-intensive urban layout basically consists of retaining walls, bridges, buildings and the backscene. This part is finally beginning to take shape, but is still a long way from completion.


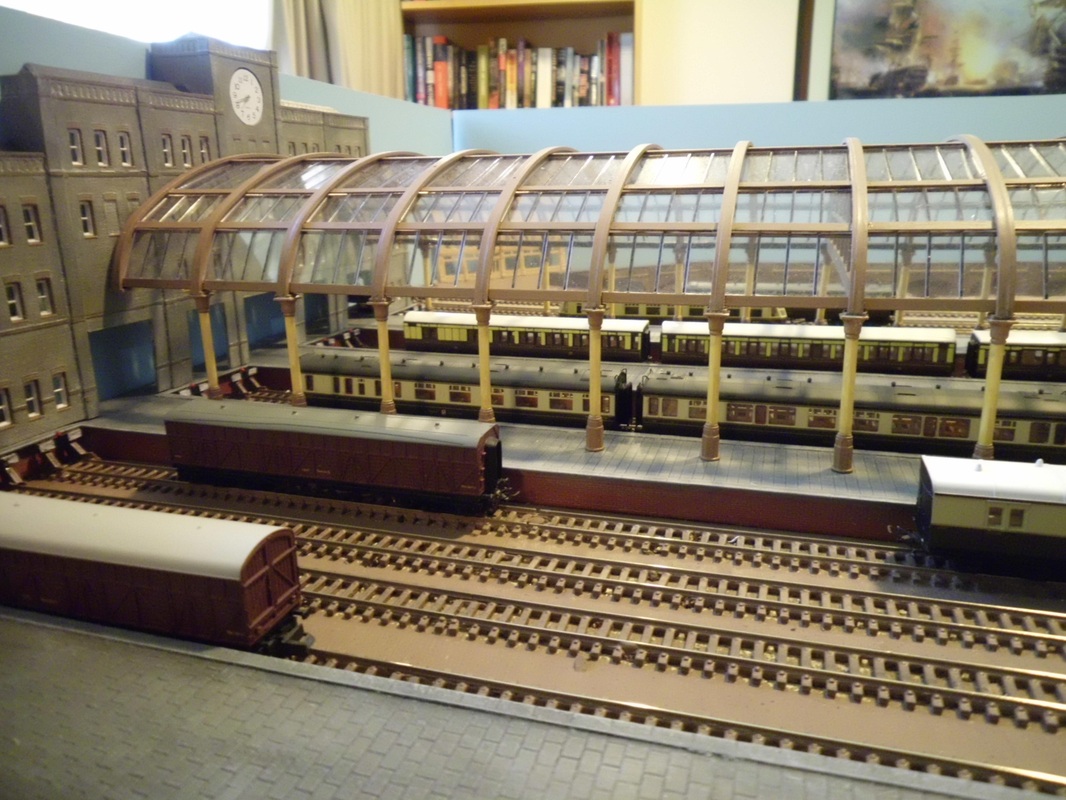
Platforms
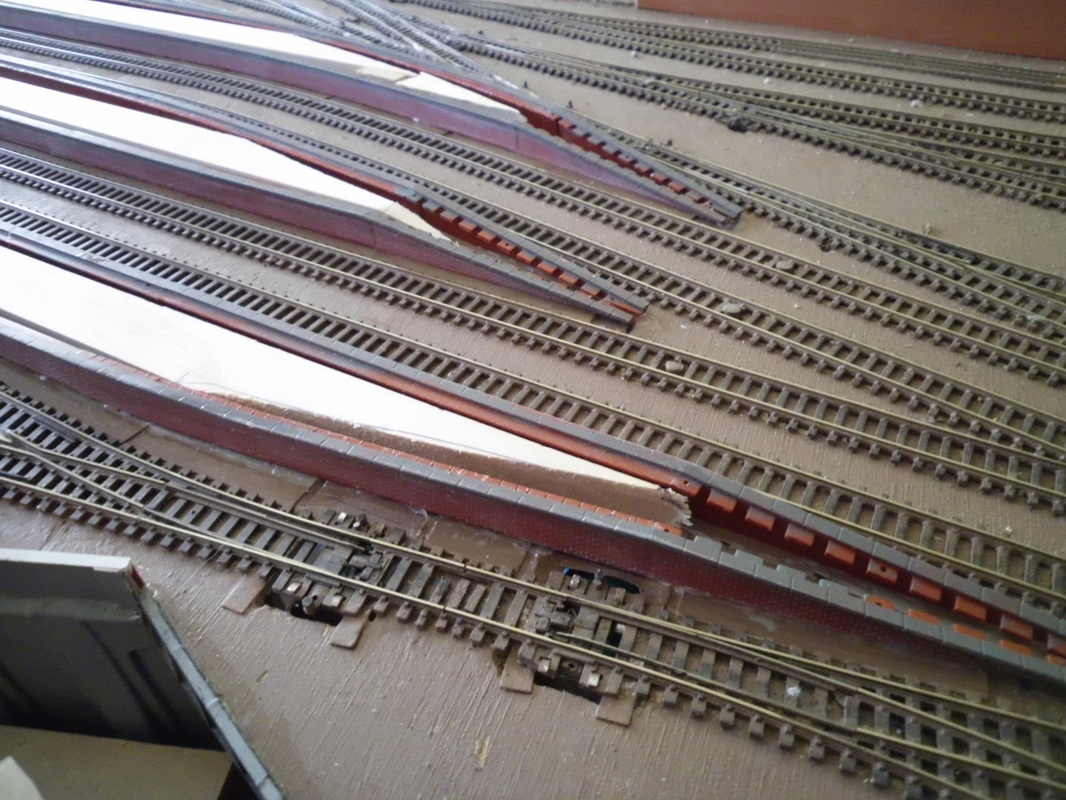
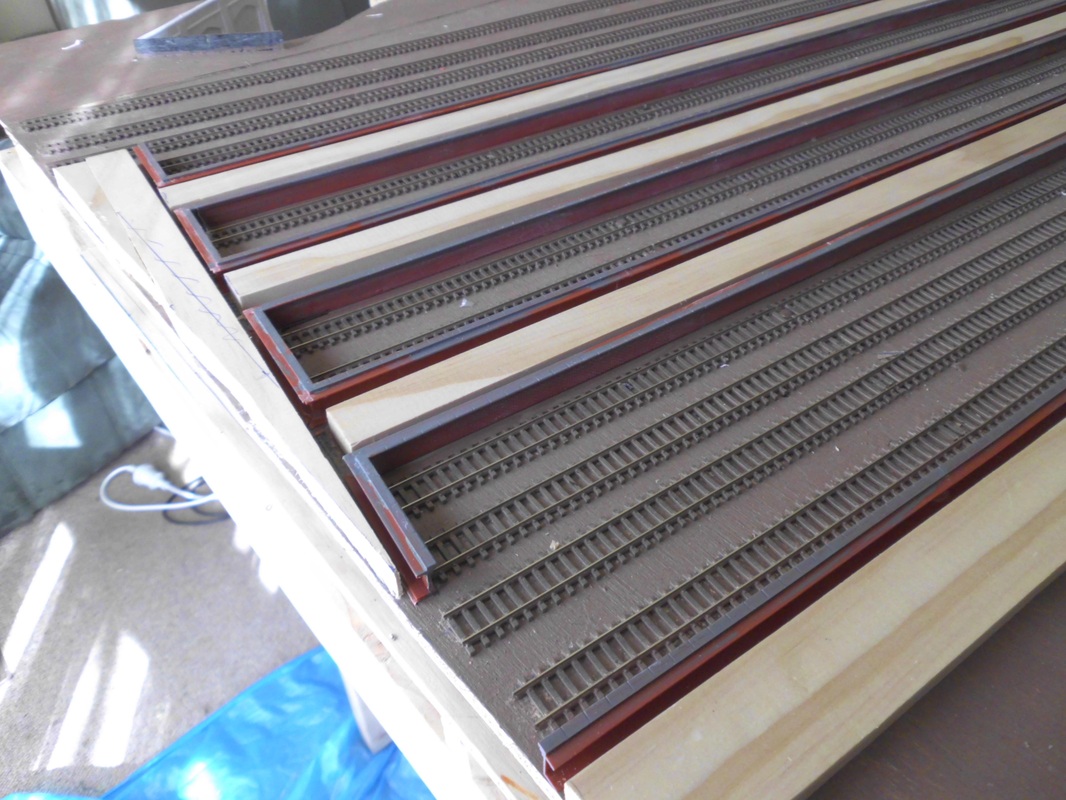
The platforms are built using Peco platform edges and Slaters paving sheets. 11mm pine moldings were used to provide a solid core and act as extra framing members for the upper baseboard, since there is very little under-board framing at that end of the layout due to tight clearance issues with the descending main line.
I had to raise the platform edges with additional strips of paving slightly to match the thickness of the available timber. This makes the platforms significantly higher than they should really be. Standard platform height in the UK is 3 feet above rail level, but these are about 4' 6". The main reason was the very wide gaps required between the platform edges and the trains. Since the layout is usually viewed from above, at an angle of 30-45 degrees, using the correct low platforms with wide gaps means that you can see half way down the coach bogies, which looks more like a US or European layout. The higher platforms mean that the coach under frames are just visible from this angle, so everything looks right.
Retaining Walls
Most of the retaining walls are Langley mouldings, mainly salvaged from a previous layout. The high walls at the rear of the layout are Slaters stone sheets over MDF, but these are generally not visible since they face the backscene. The two highest retaining walls are attached to the removable upper station base board.
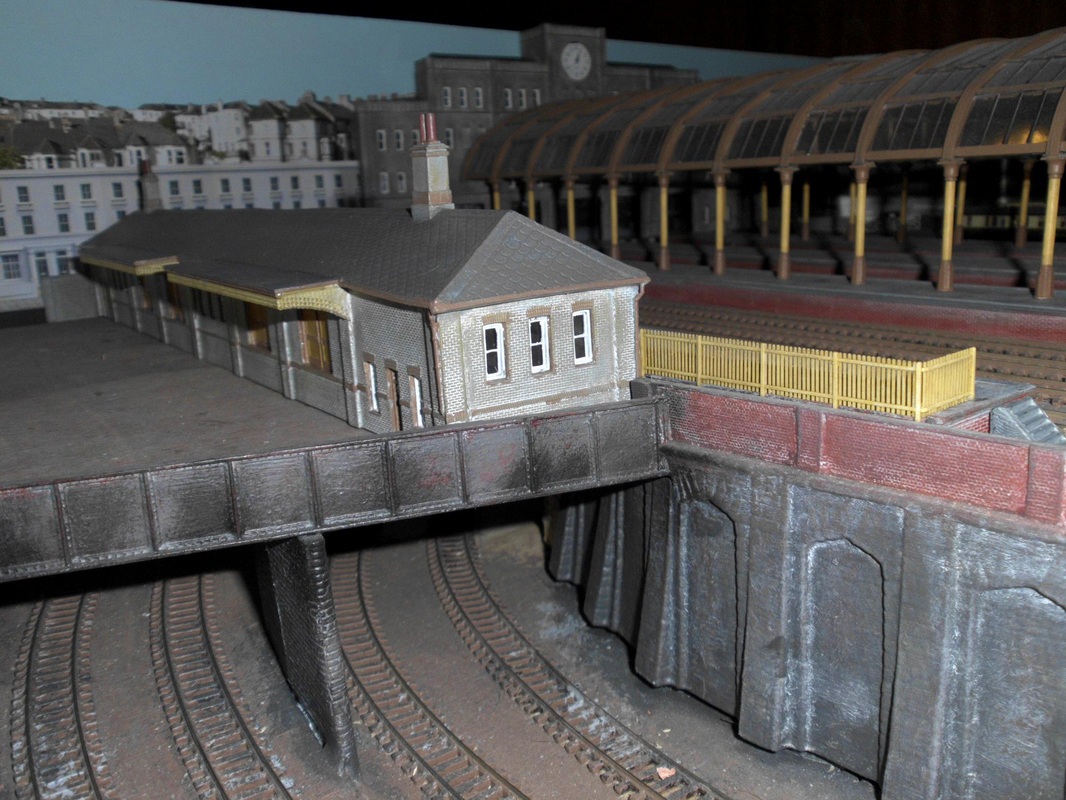
Bridges
All of the bridges are of the plate girder type. These have all been cut to appropriate lengths, joining two end pieces to maintain symmetry.
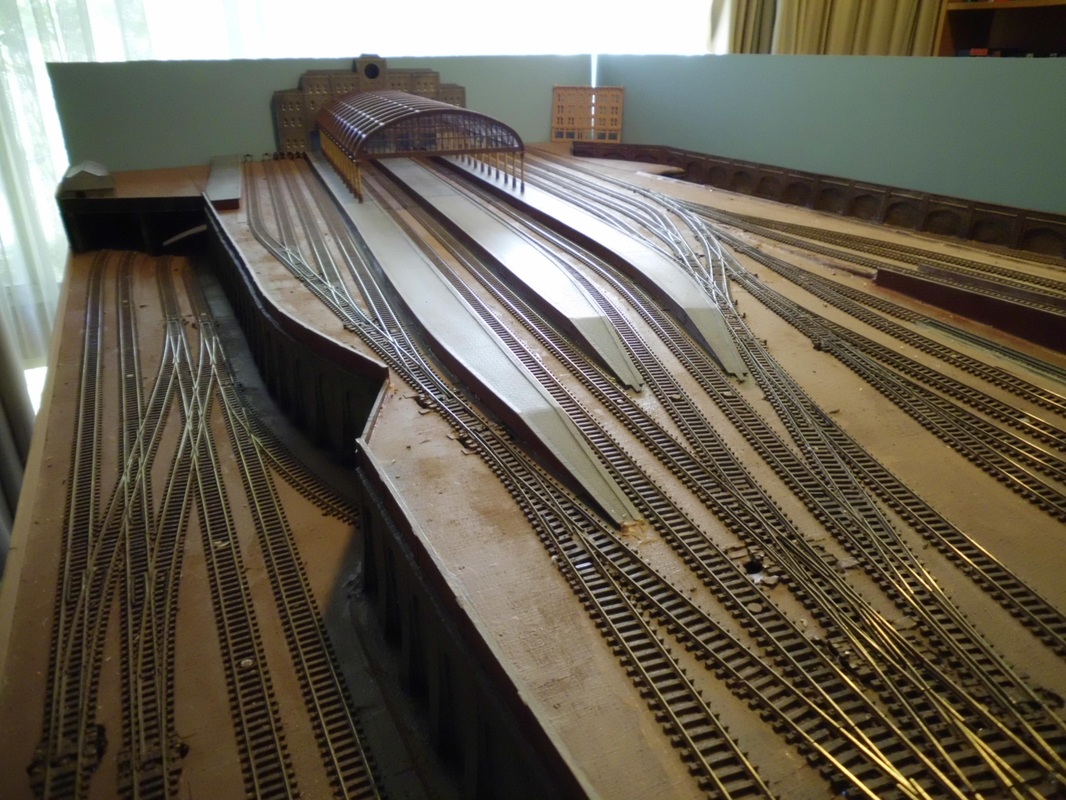
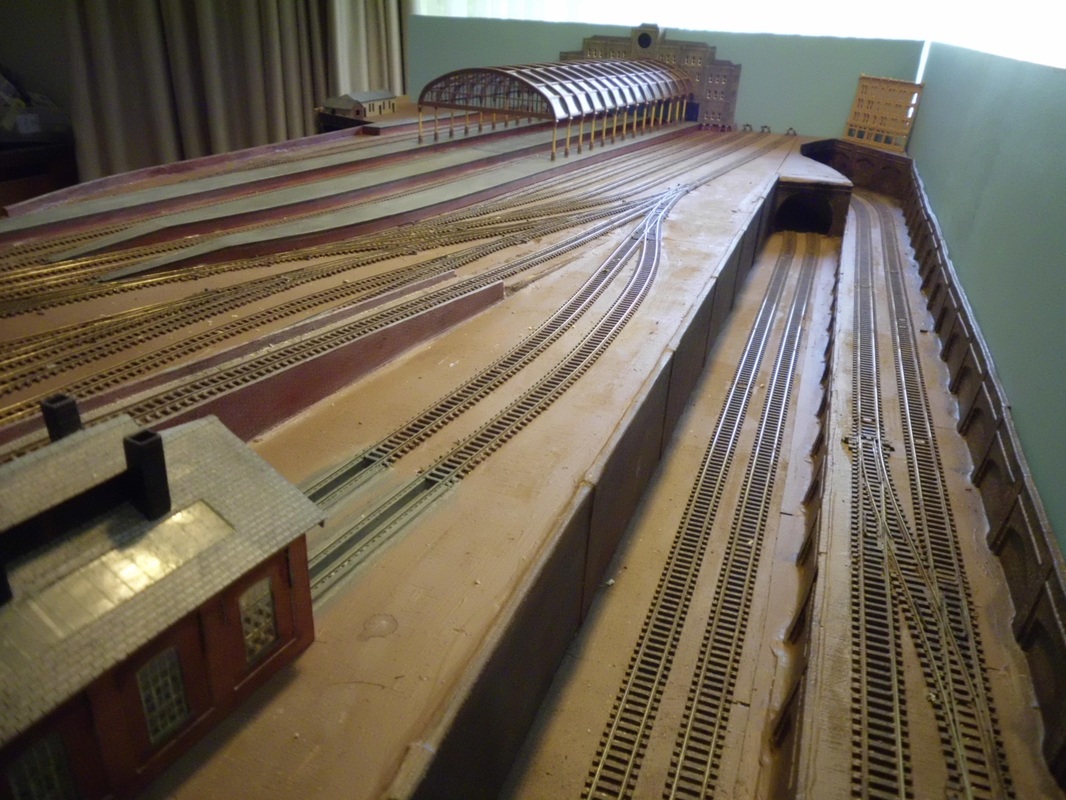
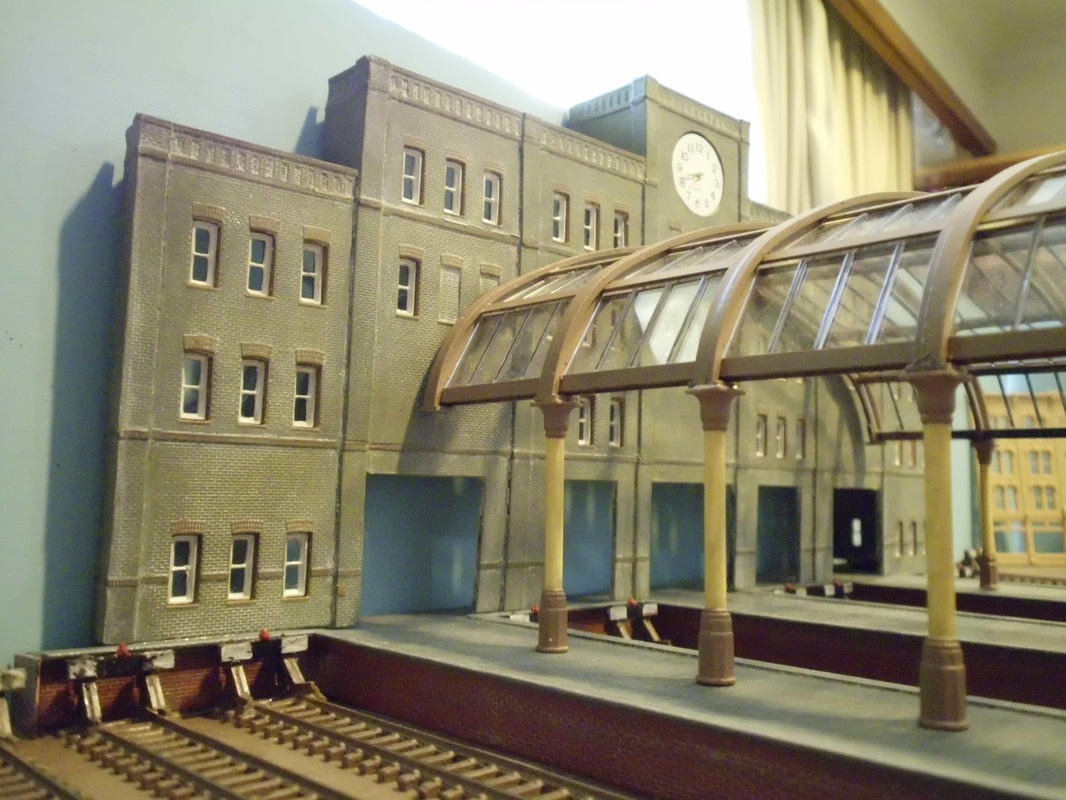
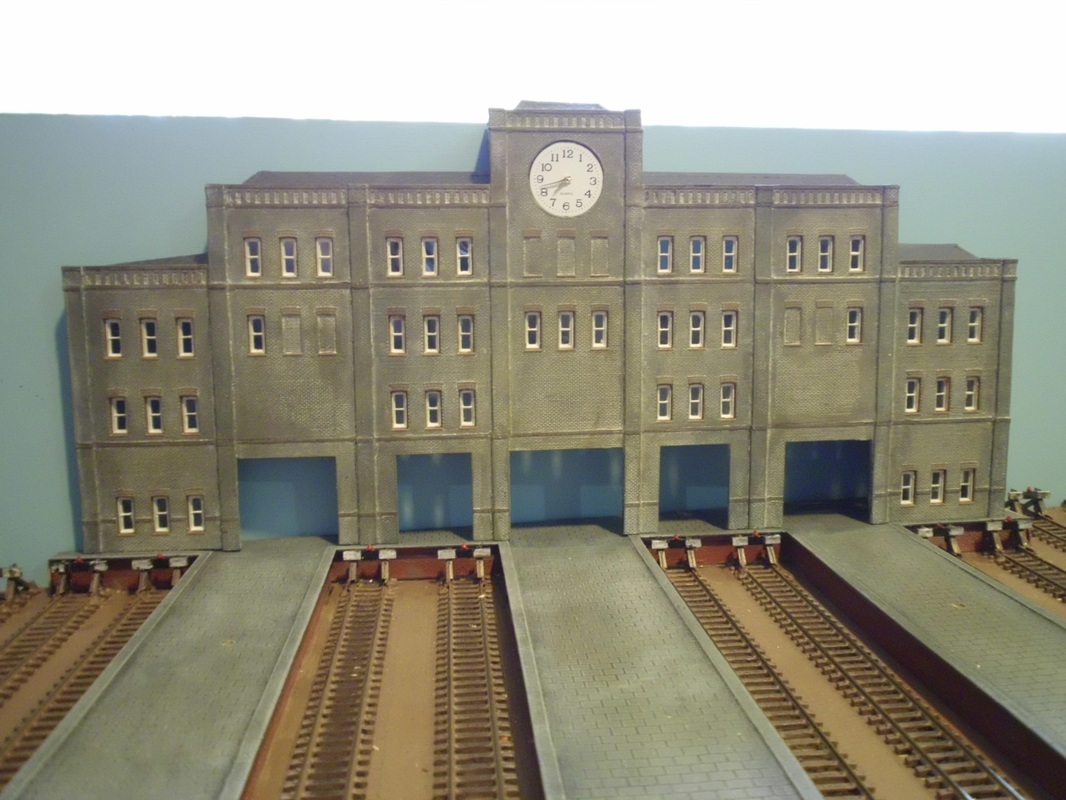
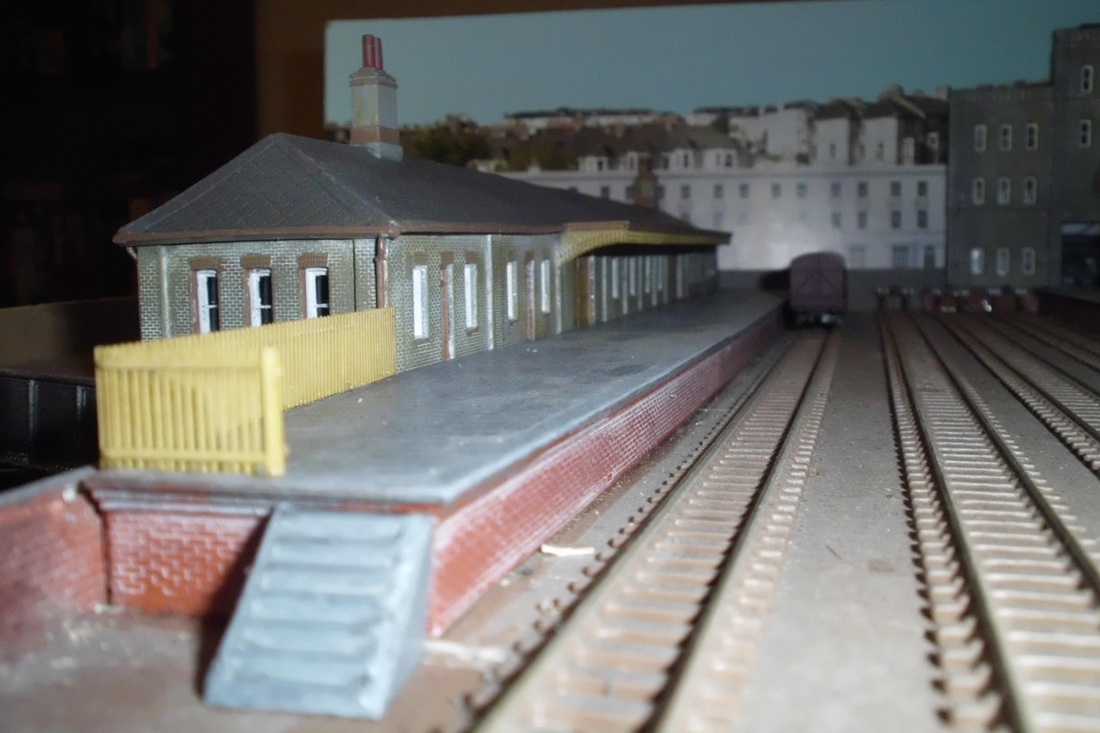
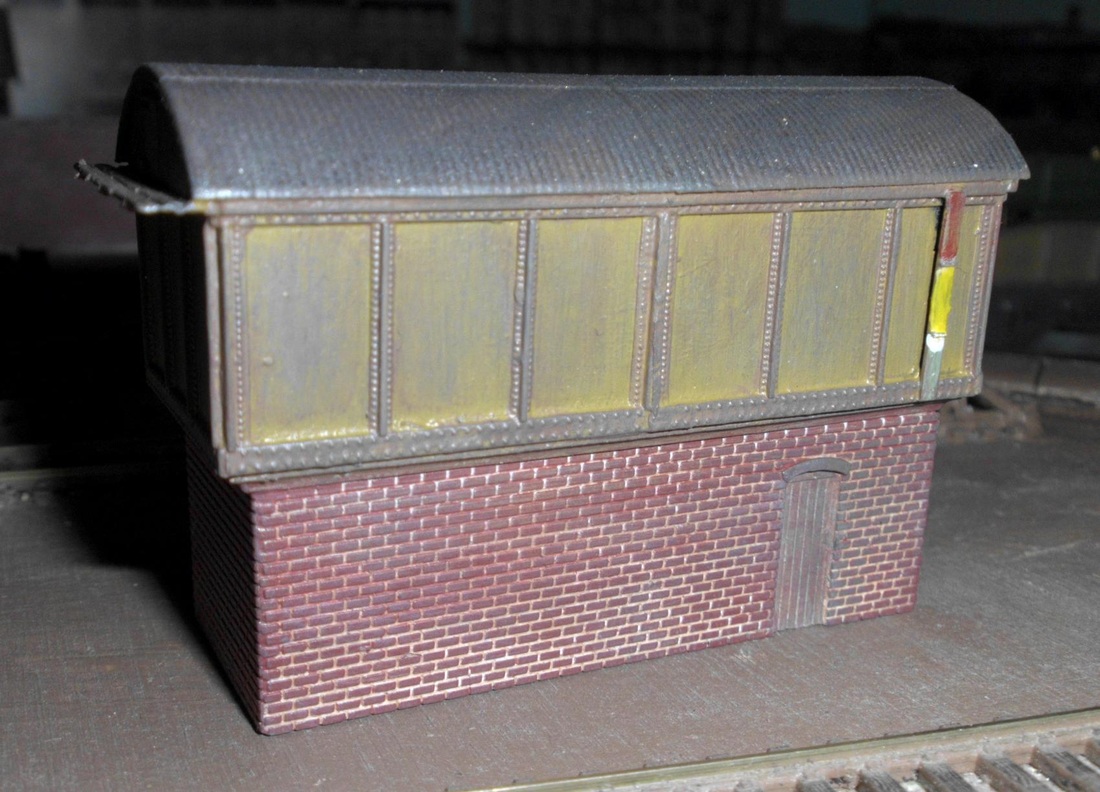
Main Station Buildings
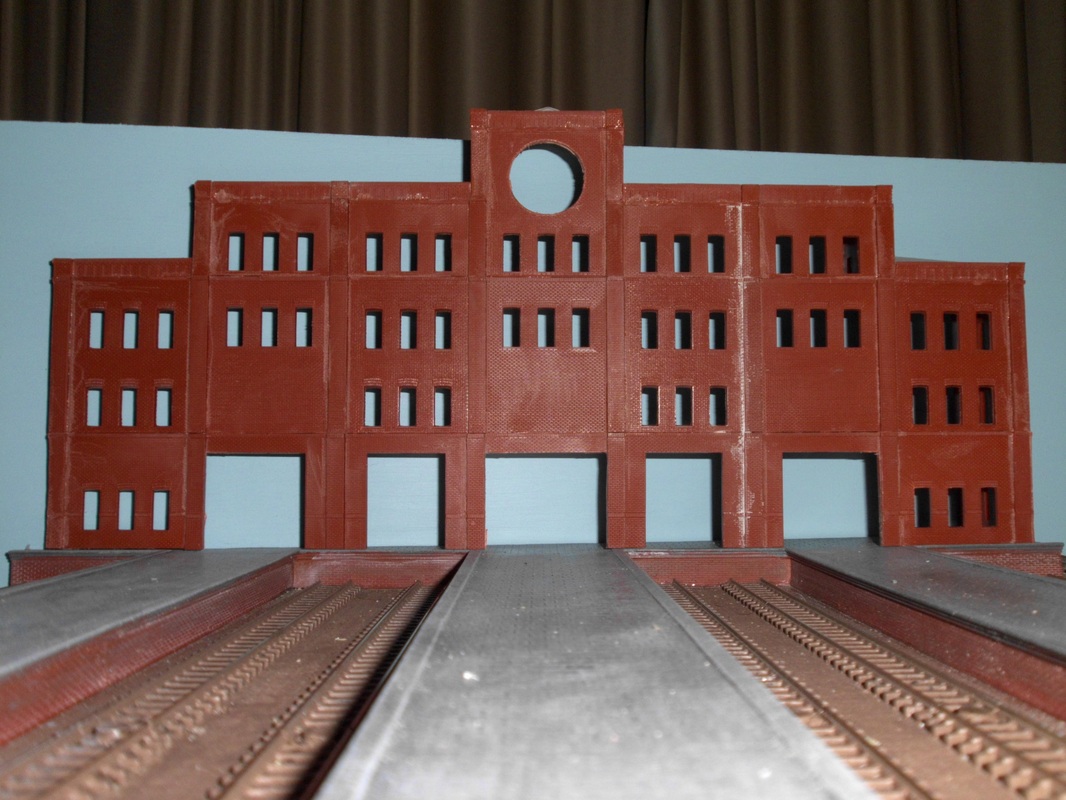
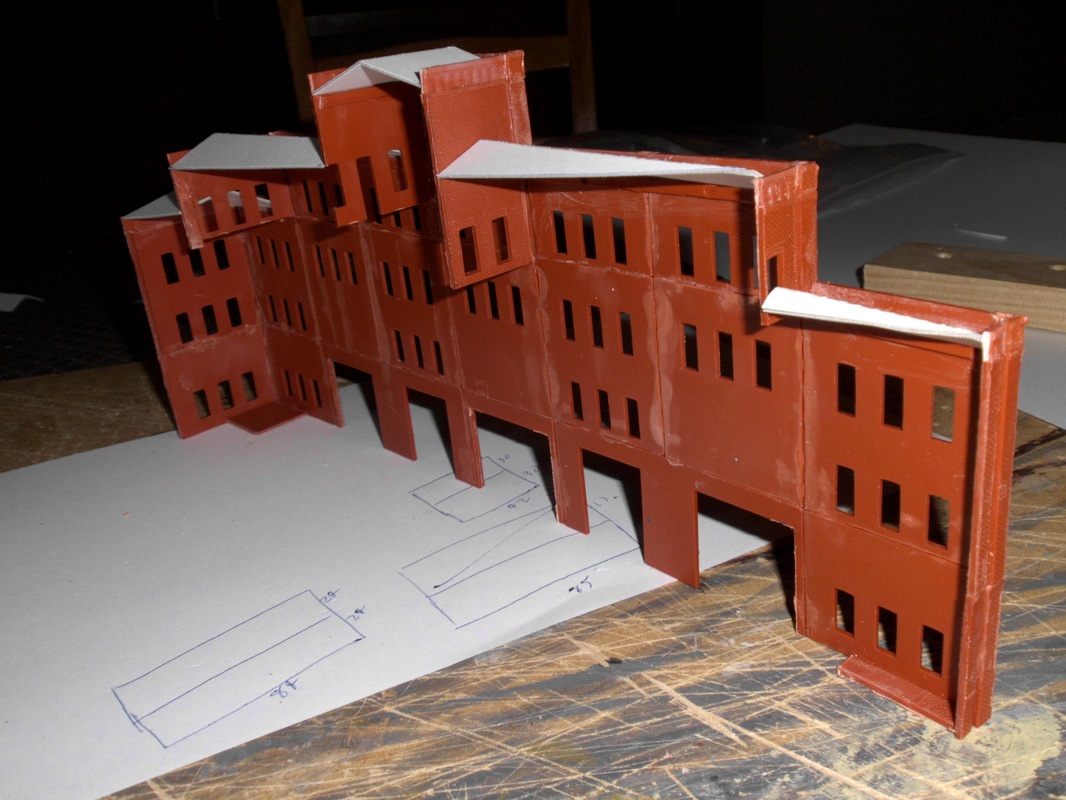
The main station building was originally intended to be part of the backscene, using a heavily edited and recoloured version of the Townscene clothing factory. This proved to be underwhelming, since it forms the main visual focus for the whole layout. The perspective also did not quite work out due to the 10 degree angle that the entire station is built on.
I ended up building a low relief model using the DPM modular walls. These are intended for (red brick) industrial buildings, but look quite good for less mundane structures as long as a suitable roof is provided. The roof was built from a Slaters tile sheet after several rounds of cardboard mockup. The main challenge was maintaining a reasonable perspective from all likely viewing angles due to the ten degree angle of this building.
The mail and parcels office was built in the same way, though as a complete stand-alone building. The canopies and chimneys are from various Ratio kits. This building is held down with a couple of magnets superglued to the inside walls and positioned over two screws in the baseboard.
The station clock is intended to be a working fast clock, large enough to be visible from the far end of the layout, but I am having some issues soldering to tiny, fragile pads on the watch mechanism. TBD.
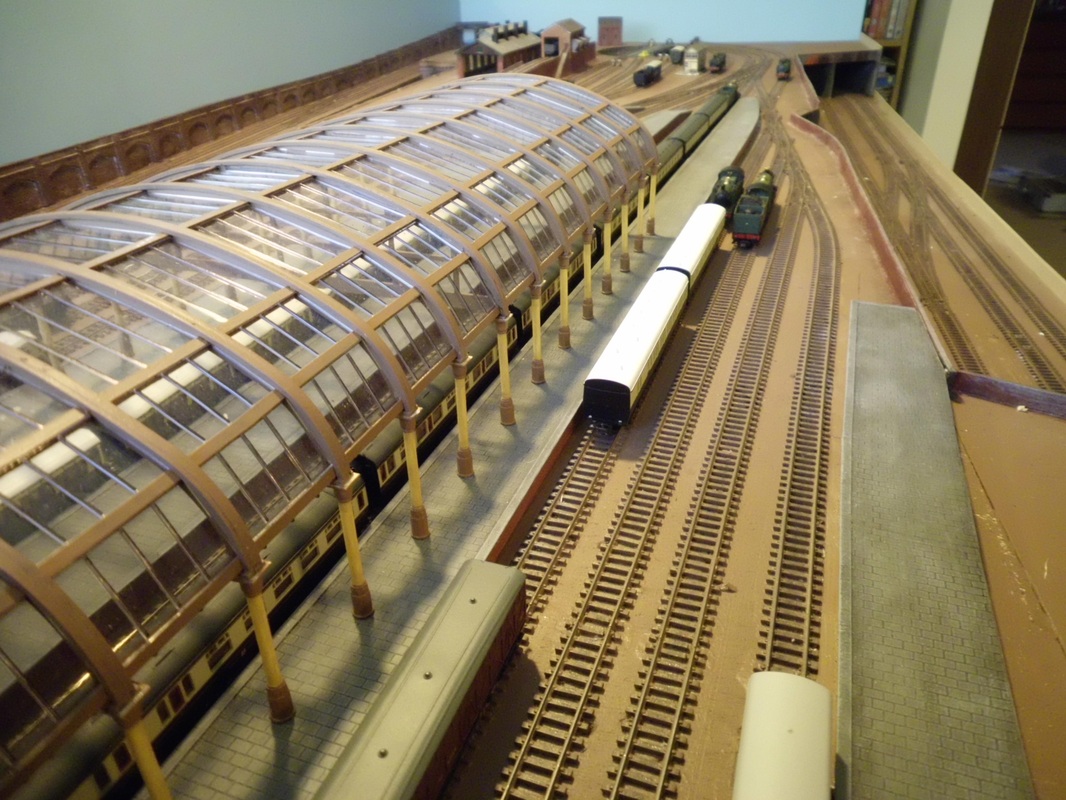
Overall Roof
The overall roof is the Peco OO kit. It is the only structure on the layout designed to be easily and routinely removed to cope with derailments and other mishaps: it sits on the platforms with pins on six of the support pillars fitting into matching holes. The original intent was to simply build a skeletal version of the kit with widely spaced internal arches to allow direct access, but an initial trial build showed that this just did not look right, and did not offer enough of an access improvement anyway.
The pillars of the overall roof are quite high, which leaves the outer platforms exposed to the weather. I intend to add sloping canopies to these platforms in the future, utilizing the spare glazing elements from the kit.
Other Buildings
The coal stage is the Hornby Lyddle end product. Unfortunately this has the ramp at the wrong end, so one had to be built the hard way. Alas, I didn't notice the Mill lane Sidings GWR coaling stage until I had already committed to using this product.
The signal box is the Ratio model. The water tower is currently the Kestrel product, but is being replaced by the new Ratio tower. The engine shed is the Metcalfe card kit, but I hope to replace this with the Kato equivalent as soon as I can track one down (out of production).
Painting
There are many approaches to painting models. I rely on the following rules:
The platforms are built using Peco platform edges and Slaters paving sheets. 11mm pine moldings were used to provide a solid core and act as extra framing members for the upper baseboard, since there is very little under-board framing at that end of the layout due to tight clearance issues with the descending main line.
I had to raise the platform edges with additional strips of paving slightly to match the thickness of the available timber. This makes the platforms significantly higher than they should really be. Standard platform height in the UK is 3 feet above rail level, but these are about 4' 6". The main reason was the very wide gaps required between the platform edges and the trains. Since the layout is usually viewed from above, at an angle of 30-45 degrees, using the correct low platforms with wide gaps means that you can see half way down the coach bogies, which looks more like a US or European layout. The higher platforms mean that the coach under frames are just visible from this angle, so everything looks right.
Retaining Walls
Most of the retaining walls are Langley mouldings, mainly salvaged from a previous layout. The high walls at the rear of the layout are Slaters stone sheets over MDF, but these are generally not visible since they face the backscene. The two highest retaining walls are attached to the removable upper station base board.
Bridges
All of the bridges are of the plate girder type. These have all been cut to appropriate lengths, joining two end pieces to maintain symmetry.
Main Station Buildings
The main station building was originally intended to be part of the backscene, using a heavily edited and recoloured version of the Townscene clothing factory. This proved to be underwhelming, since it forms the main visual focus for the whole layout. The perspective also did not quite work out due to the 10 degree angle that the entire station is built on.
I ended up building a low relief model using the DPM modular walls. These are intended for (red brick) industrial buildings, but look quite good for less mundane structures as long as a suitable roof is provided. The roof was built from a Slaters tile sheet after several rounds of cardboard mockup. The main challenge was maintaining a reasonable perspective from all likely viewing angles due to the ten degree angle of this building.
The mail and parcels office was built in the same way, though as a complete stand-alone building. The canopies and chimneys are from various Ratio kits. This building is held down with a couple of magnets superglued to the inside walls and positioned over two screws in the baseboard.
The station clock is intended to be a working fast clock, large enough to be visible from the far end of the layout, but I am having some issues soldering to tiny, fragile pads on the watch mechanism. TBD.
Overall Roof
The overall roof is the Peco OO kit. It is the only structure on the layout designed to be easily and routinely removed to cope with derailments and other mishaps: it sits on the platforms with pins on six of the support pillars fitting into matching holes. The original intent was to simply build a skeletal version of the kit with widely spaced internal arches to allow direct access, but an initial trial build showed that this just did not look right, and did not offer enough of an access improvement anyway.
The pillars of the overall roof are quite high, which leaves the outer platforms exposed to the weather. I intend to add sloping canopies to these platforms in the future, utilizing the spare glazing elements from the kit.
Other Buildings
The coal stage is the Hornby Lyddle end product. Unfortunately this has the ramp at the wrong end, so one had to be built the hard way. Alas, I didn't notice the Mill lane Sidings GWR coaling stage until I had already committed to using this product.
The signal box is the Ratio model. The water tower is currently the Kestrel product, but is being replaced by the new Ratio tower. The engine shed is the Metcalfe card kit, but I hope to replace this with the Kato equivalent as soon as I can track one down (out of production).
Painting
There are many approaches to painting models. I rely on the following rules:
- Use flat acrylics for everything. They can be thinned and cleaned up with water, are very quick drying and can be cheaply obtained as sample pots from your local paint store.
- Paint everything. An unpainted plastic surface will always look like an unpainted plastic surface.
- Don't paint anything in pure white or pure black. In real life, these colours are always muted by distance and grime. If you use them, dry-brush on a little bit of light or dark grey to tone things down.
- Don't use large areas of pure colours. In the real world, there is always some colour variation. Just take a look at the surface of your own street - it will almost certainly be a mix of grays with some brown patches. When I do paint a large area, I put down the basic colour, then dry-brush on a little bit of a different shade, usually just a lighter or darker version of the same thing. Then most surfaces can use a little brown, either dry-brushed or a very dilute wash, possibly even wiped off a minute or two later to further spread and weaken the effect. For example, the main station building was painted in a medium grey, then flooded with white which was promptly wiped off to fill the mortar courses, then touched up with some dry brushing of a darker gray to compensate for the remaining thin layer of white. I then drybrushed on a little bit of slightly greenish cream (basically the same colour I used as light stone on the pillars of the overall roof).
