Plymouth Citadel - Backscene
The first attempt at the backscene is now complete. I am not totally happy with it, so may end up reworking it at the end of the project.
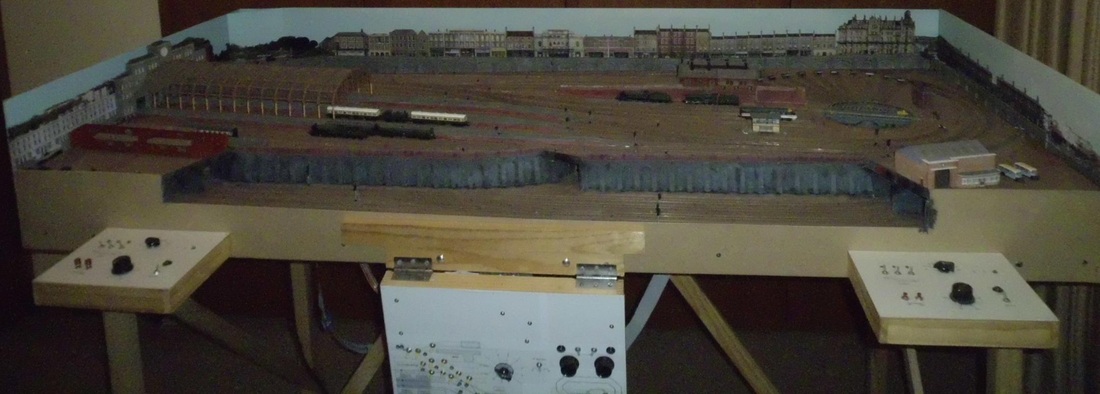
The backboards are just sheets of MDF, screwed into the main frames, with short pieces of wooden corner moldings to keep the corners together. These were painted blue and then some thin hazy clouds added. I did this using a small amount of white paint (water based acrylic), applying a small dab and then thoroughly brushing it out to thin it and cover as much sky as possible. I then just brushed a little water onto the same area to further dilute the effect, and even wiped some off using a paper towel. It is important to do all the brushing and wiping with horizontal strokes. The final effect is quite subtle, but unfortunately doesn't really show up in the pictures. It is, however, a change from the usual fluffy white clouds.
The backboards are just sheets of MDF, screwed into the main frames, with short pieces of wooden corner moldings to keep the corners together. These were painted blue and then some thin hazy clouds added. I did this using a small amount of white paint (water based acrylic), applying a small dab and then thoroughly brushing it out to thin it and cover as much sky as possible. I then just brushed a little water onto the same area to further dilute the effect, and even wiped some off using a paper towel. It is important to do all the brushing and wiping with horizontal strokes. The final effect is quite subtle, but unfortunately doesn't really show up in the pictures. It is, however, a change from the usual fluffy white clouds.

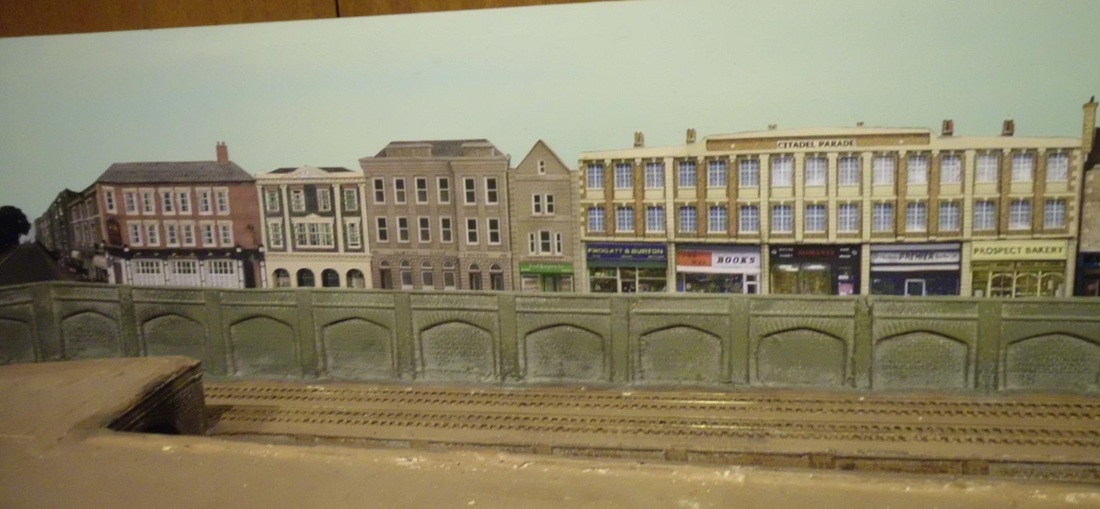
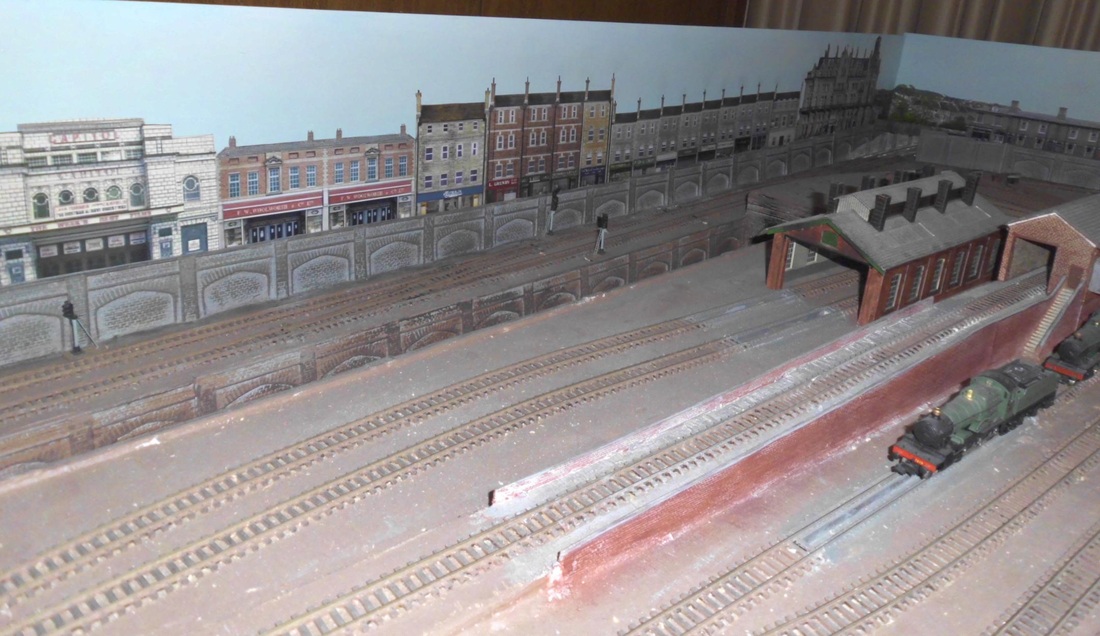
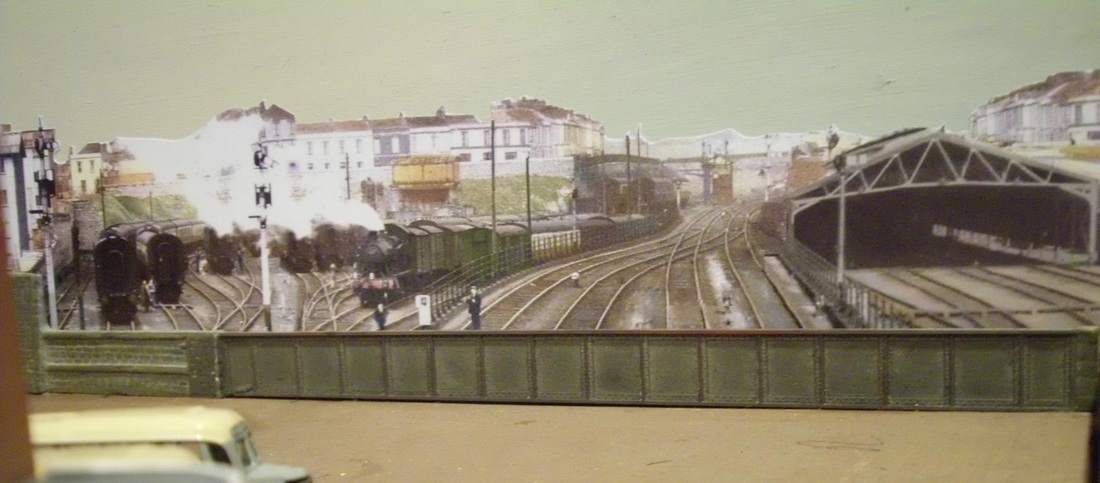
The full backscene strip (with the 3d station building superimposed). Retaining walls, buildings and such overlie parts of this.
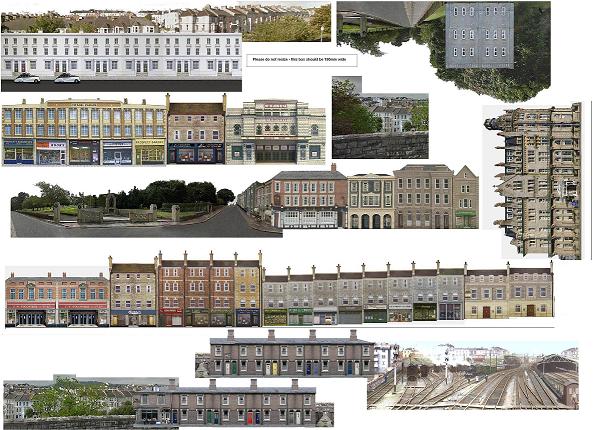

The backscene images were all prepared on my computer then printed out at my local office/print shop. I felt that this would give a better result than doing it the hard way with my inkjet (and save on ink cartridges!). In the end, either way would have given satisfactory results.
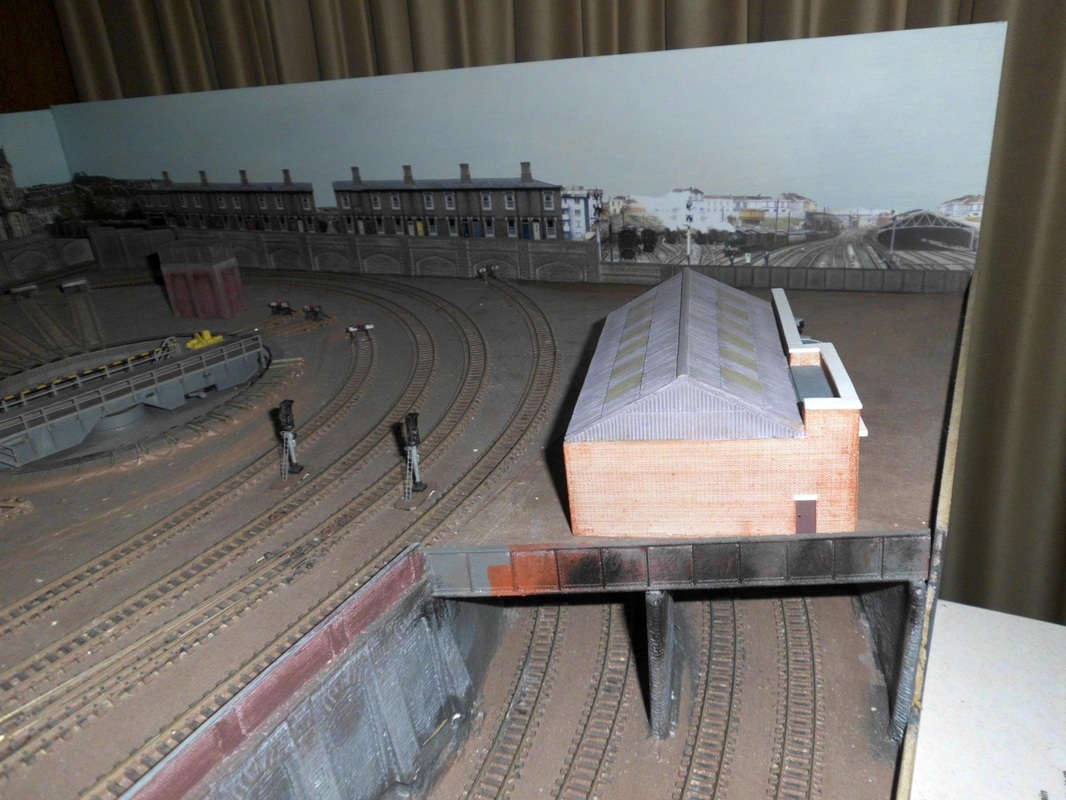
Most of the images were scrounged from various places on the Web, though the carriage sidings were a pair of black-and-white pictures from a book describing Plymouth Millbay, stitched together, repaired (the spine of the book obliterated part of them), and colorized.
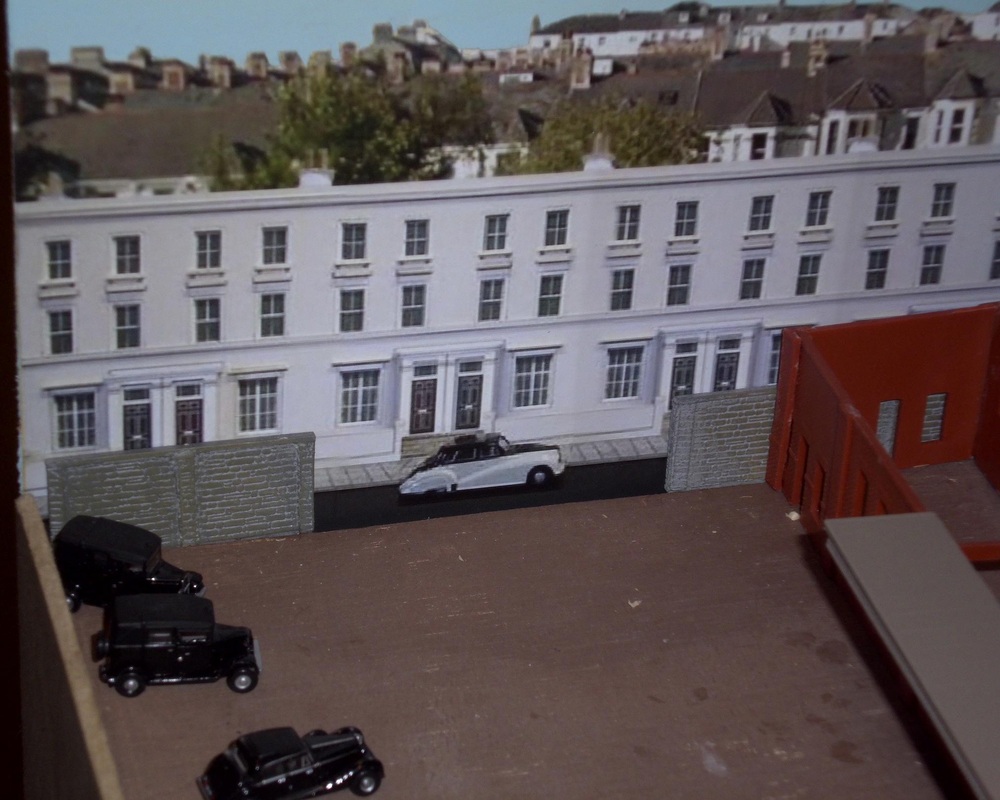
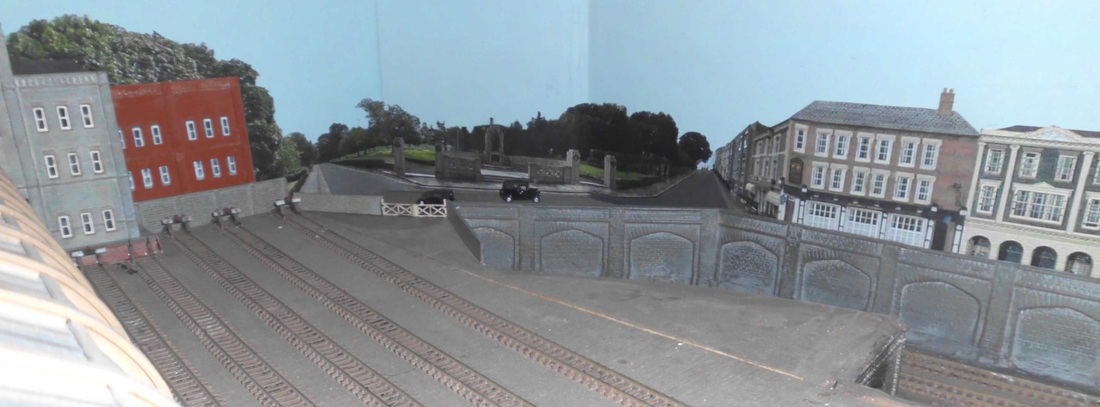
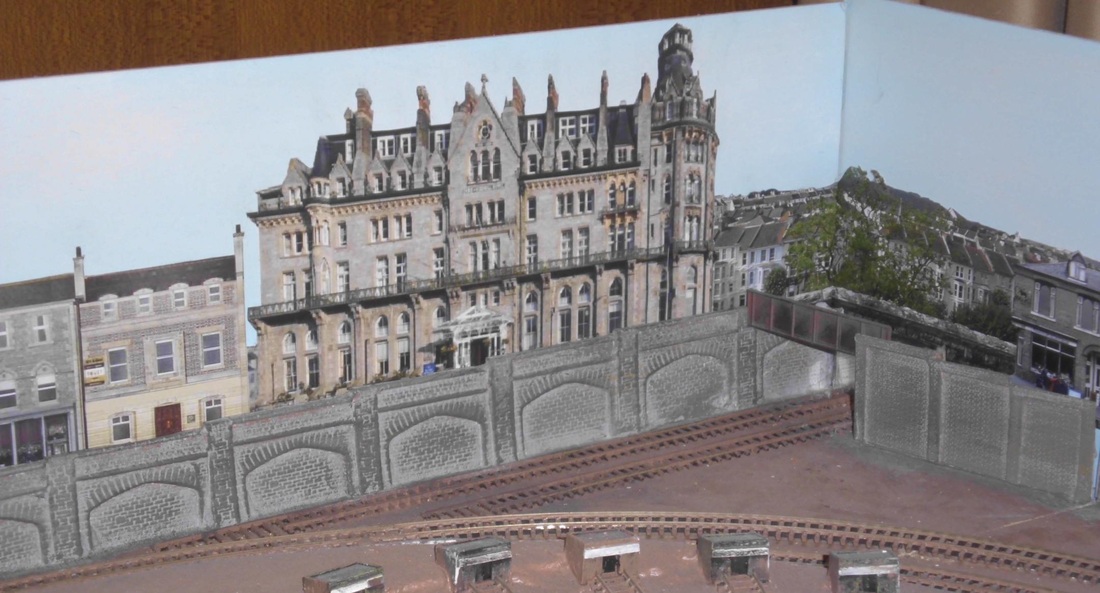
I used the Google Earth street view mode for some pictures of Plymouth, from the correct or near-correct locations (the park, the view towards Cornwall and the distant shots of house backs). Some serious editing was required to stitch multiple images together, adjust the perspective and contrast, then remove all of the modern anachronisms: yellow lines, vehicles, signs, people, etc.
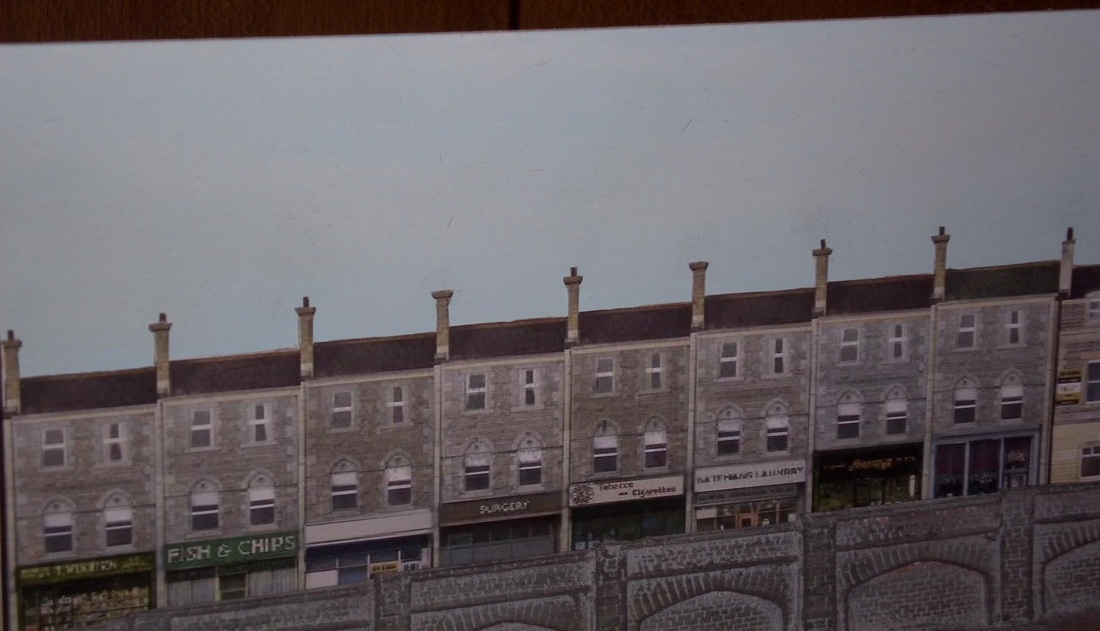
Most of the buildings are actually pictures of model buildings. I found these much easier to adapt than pictures of the real thing. These were generally the manufacturers' stock shots of various kits and RTP buildings, again with heavy editing for colour, perspective, extra floors and varied shop fronts. Most of these stock photos are fairly low resolution, which is not a problem given the viewing distance and N scale.
Most of the images were scrounged from various places on the Web, though the carriage sidings were a pair of black-and-white pictures from a book describing Plymouth Millbay, stitched together, repaired (the spine of the book obliterated part of them), and colorized.
I used the Google Earth street view mode for some pictures of Plymouth, from the correct or near-correct locations (the park, the view towards Cornwall and the distant shots of house backs). Some serious editing was required to stitch multiple images together, adjust the perspective and contrast, then remove all of the modern anachronisms: yellow lines, vehicles, signs, people, etc.
Most of the buildings are actually pictures of model buildings. I found these much easier to adapt than pictures of the real thing. These were generally the manufacturers' stock shots of various kits and RTP buildings, again with heavy editing for colour, perspective, extra floors and varied shop fronts. Most of these stock photos are fairly low resolution, which is not a problem given the viewing distance and N scale.
Software
I made extensive use of the following software:
I made extensive use of the following software:
- Google Earth (PC, Mac, Linux, free) - the street view mode is extremely useful for real urban locations, as long as they have not changed too much from the chosen period. I also found the normal view mode could provide excellent rural landscapes (showing the landforms but not buildings). I had planned to use these for the distant horizons, but decided against in the end due to the very urban nature of the setting. They would be very effective indeed in a more rural setting.
- MS Paint (PC) - ye olde basic paint program, for basic editing tasks. Any similar program would serve as well. Has some nice features but some really irritating flaws.
- GIMP (GNU Image Manipulation Program) (PC, Mac, Linux, free) - I used this for the more advanced editing - perspective changes, colour and contrast changes, blurring and correcting visual defects.
- Microsoft ICE (Image Composite Editor) (PC, free) - a basic panorama stitcher. It doesn't get great reviews from the photographic fraternity, but I found it was better at handling the Google street view images than the more well known programs.
- Akvis Colorizer (PC, free demo mode) - I used this to colorize the black and white photo of the carriage sidings. It worked better than the other two I tried, but I am still not totally happy with the result - it still looks too much as if I splashed a child's water colours over a black and white image. I think that is a combination of the nature of the picture (it seems to work much better for portraits) and my very limited artistic talents.
